¶ Integration Settings
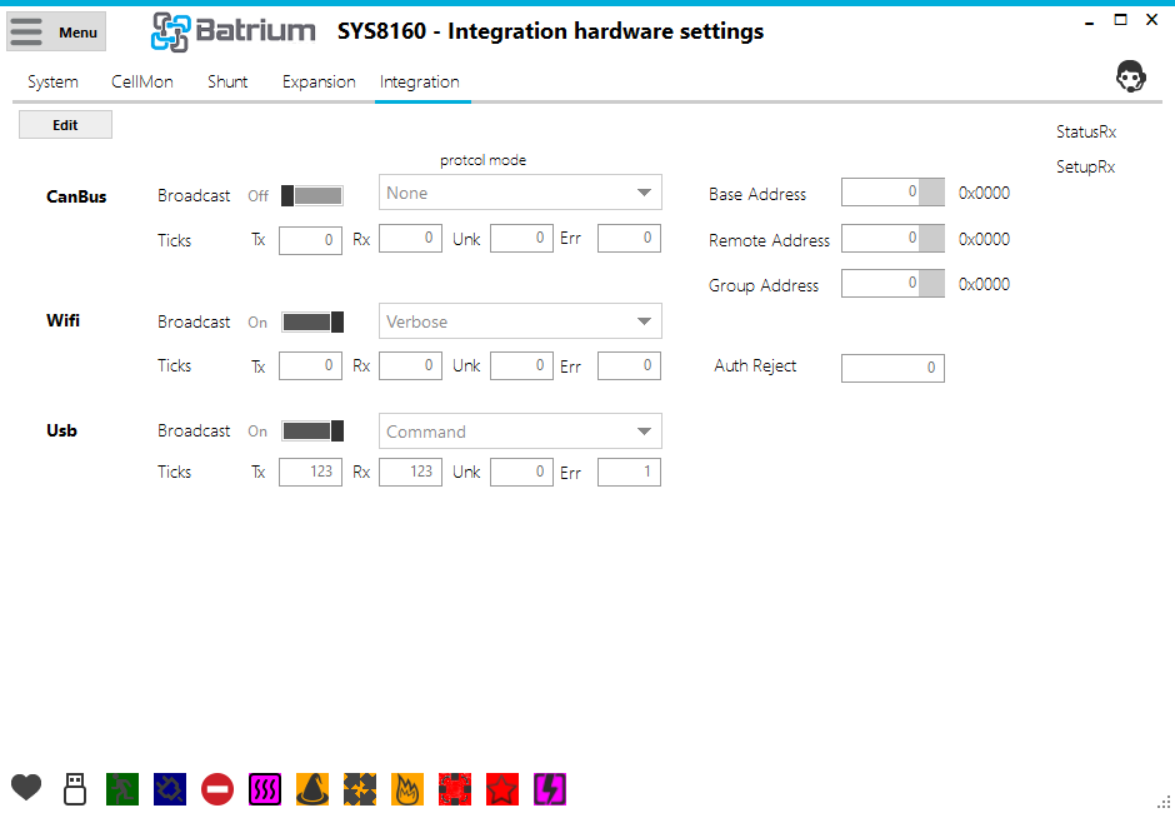
Administrative screen for the WatchMon supervisor hardware, and how to understand the various fields available to configure the hardware integration settings.

Navigate to the screen via the Hardware Menu option and choose the Integration tab. Editing is only available when in 'Technician' mode.
¶ Edit Mode Overview
- Set the CANbus mode to the appropriate external connecting system.
- Save.
- Set the WiFi to broadcast or not and how much detail.
- Set the USB to broadcast or not and how much detail.
With version 2.0 we have introduced counters for WiFi/USB diagnostics and some new inverters.
¶ Field Definitions
¶ CANbus
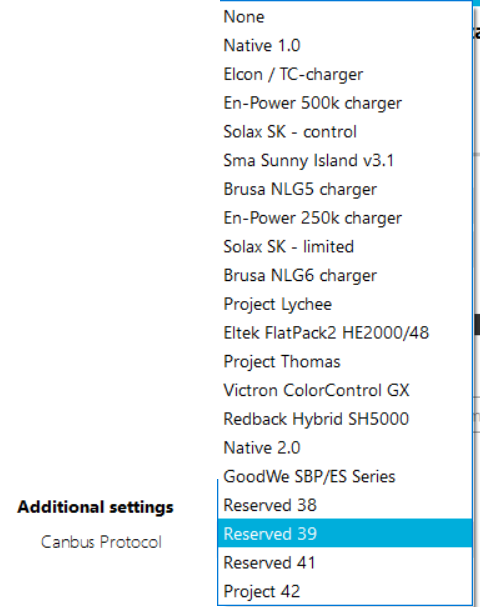
Settings include an ON/OFF broadcast switch and an active light as well as the ability to choose the protocol from a list.

¶ WiFi
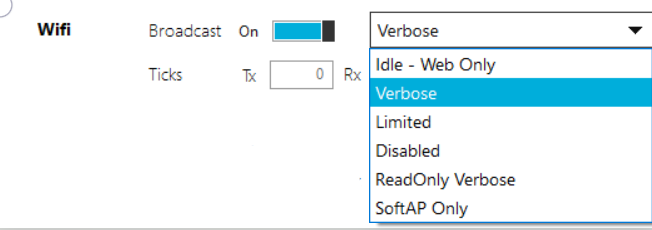
Settings include an ON/OFF broadcast switch and an active light as well as the ability to choose the protocol from a list. Some diagnostics have been added so that we can better track what is happening.

The option for WiFi includes the following options. Some of these options are new with version 2.0 of the software to allow more flexibility.

¶ USB
Settings include an ON/OFF broadcast switch and an activity status. Some diagnostics have been added so that we can better track what is happening.

¶ Action Button / Process Link Events
¶ Status RX
Flashes as status telemetry is received (hovering over will display time received).

¶ Setup RX
Flashes when setup configuration is received (hover over will display time received).
¶ Edit Button
This button opens fields to editing, only available when in Technician mode.

¶ Undo
Restores values to last saved values and returns to read-only mode.

¶ Save
Saves values into the system and returns to read-only mode. This only works when connected by a USB. If saving whilst connected via WiFi the following Error message appears.

¶ Default
Restore values to default.
¶ Support Tip
Pressing this button calls up the knowledge base on this screen.

¶ Changing Protocols: Update the REMOTE Settings
When changing the CANbus profile in the Integration Tab, make sure to update the scaling on the Control Logic: Remote.

The scaling needs to be set to 'Default' after changing protocols to make it compatible with the selected profile. Then click ‘Save’.

Remember: If you change the CANbus profile without re-running the SETUP: Wizard, you will need to run the defaults on the control remote to ensure that the scaling is set correctly.